
Laminate flooring is a popular choice among homeowners due to its aesthetic appeal and durability. However, it is not invulnerable to the wear and tear of daily life, and water damage is a common problem that can tarnish its appearance and functionality.
If your laminate flooring has fallen victim to water damage, don’t despair. In this guide, we will walk you through the steps on how to effectively repair laminate flooring water damage, ensuring that your floor returns to its former glory with minimal effort and expense.
Laminate flooring is a synthetic flooring product that is designed to imitate the appearance of wood or stone. It consists of several layers, including a wear layer, a design layer, and a core layer, all of which are fused through a lamination process.
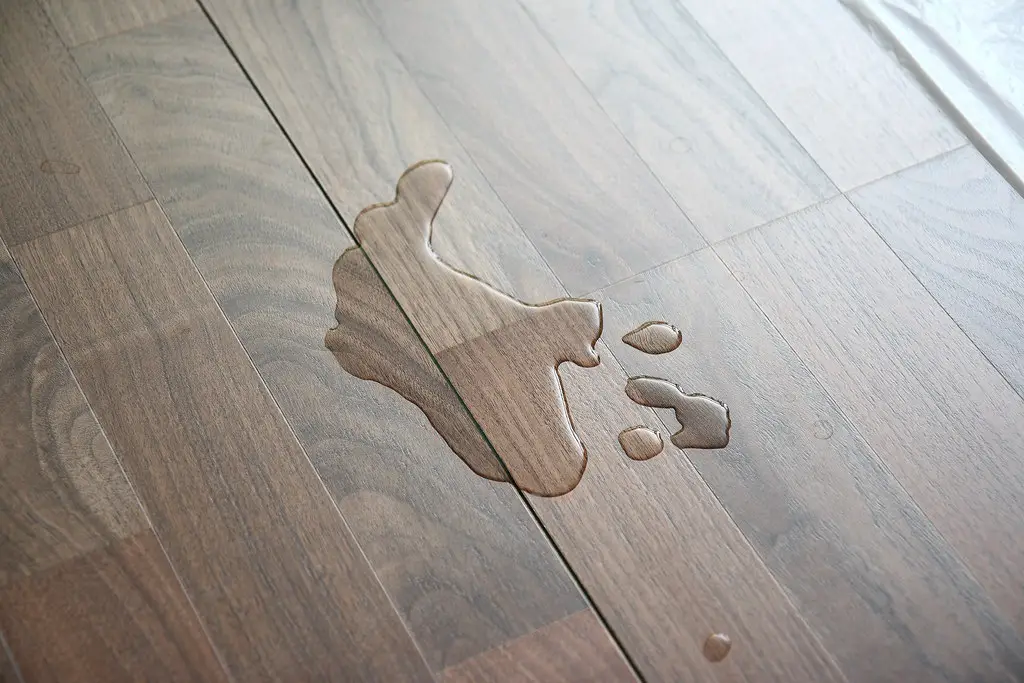
Water damage is a prevalent issue with laminate flooring. Despite its robust structure, laminate flooring’s susceptibility to water damage arises from its wood-based core, which can absorb moisture and swell, causing warping or even structural failures.
This damage is particularly common in areas of high humidity or where spills and leaks are frequent, such as kitchens and bathrooms.
Identifying Water Damage
Signs of Water Damage on Laminate Flooring
1. Swelling or Warping
The most noticeable sign of water damage is swelling or warping of the laminate boards. The wood-based core of laminate flooring can absorb water and expand. This expansion can push against adjacent boards, leading to a warped appearance. If you notice unusual bulges or areas on your floor that are no longer level, it could be a sign of water damage.
2. Discoloration
Another clear indication of water damage is discoloration. Water can seep into the laminate and cause dark spots or stains on your flooring. These spots may vary in color, but they’re typically darker than the laminate’s original color.
3. Soft or Squishy Feel
If a particular area of your laminate floor feels soft or squishy when you walk on it, it’s a probable sign of water damage. This softness is due to the water weakening the core structure from beneath, reducing its rigidity.
4. Unpleasant Odor
Continuous dampness under the laminate can lead to mold or mildew growth, which leaves behind a musty, unpleasant odor. If your room smells damp or musty, it might be due to water damage underneath your laminate flooring.
5. Separation of Laminate Boards
Water can also cause the edges of your laminate boards to lift, leading to gaps or separations between the planks. If you notice increasing gaps between your laminate boards, this could be a sign of water damage.
Tools Needed to Assess the Extent of Damage
To accurately determine the extent of water damage on your laminate floor, you will need specific tools.
1. Moisture Meter
A moisture meter is a vital tool that can measure the level of moisture in your laminate flooring. This device can help identify the presence of moisture beneath the surface, which might not be visible to the naked eye.
2. Screwdriver
A simple tool like a screwdriver can be helpful to check the level of damage. You can gently push it into a swollen or warped area of the floor to gauge the extent of water penetration and softness in the core.
3. Personal Protective Equipment (PPE)
When assessing water damage, especially in the case of potential mold or mildew growth, it’s crucial to protect yourself. PPE such as gloves, safety goggles, and a respirator mask should be worn to prevent exposure to harmful substances.
4. Flashlight
A flashlight can be useful in inspecting dark corners and the underside of the floor, particularly if you’re looking at the damage from a basement or crawlspace below.
5. Pry Bar
In severe cases, you may need to lift a section of the laminate flooring to assess the damage beneath. A pry bar can be used to carefully lift the planks without causing additional damage.
Preparation Before Repair
Before you start the repair process, it’s essential to take the necessary safety measures:
Turn off the electricity in the area you are working on to avoid electric shock.
Wear appropriate personal protective equipment (PPE). This should include gloves to protect your hands, safety goggles to shield your eyes from dust and debris, and sturdy shoes to protect your feet from any sharp objects.
Make sure the room is well-ventilated. If you’re using any solvents or adhesives, they can often emit fumes that might be harmful if inhaled in a confined space.
Gathering Necessary Tools and Materials
To carry out the repair process efficiently, you need to gather essential tools and materials:
Replacement boards: Ensure you have enough replacement laminate boards that match your existing flooring. It’s always a good idea to buy a little extra to account for any mistakes or additional damage you may find.
Adhesive: You may need a special adhesive designed for laminate flooring to firmly secure the new planks.
Tapping block and pull bar: These tools are used to gently install the laminate boards without damaging them.
Spacer wedges: These help maintain a gap between your flooring and the wall, which is necessary for the laminate to expand and contract.
Saw: A saw, such as a jigsaw or a circular saw, may be required to cut replacement boards to the correct size.
Removing Damaged Laminate Planks
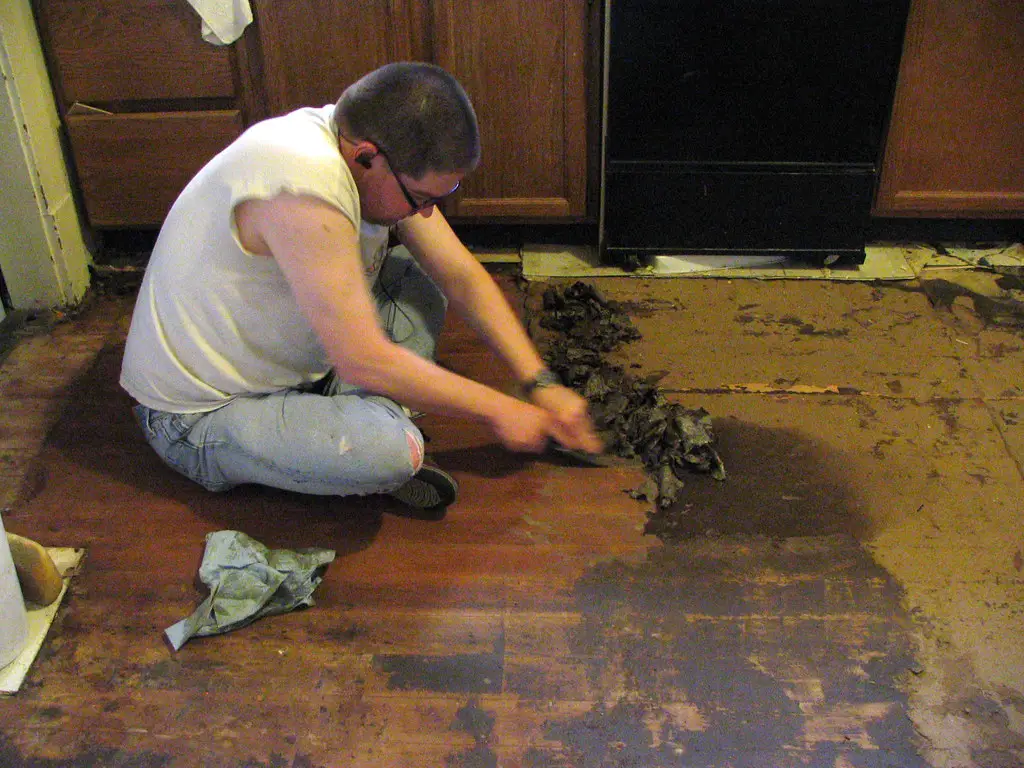
To address laminate flooring water damage, the first step involves safely removing the damaged planks.
Identify the Affected Planks: Look for signs of water damage such as swelling, warping, or discoloration. These are clear indicators of laminate flooring water damage.
Access the Damaged Plank: Start from the wall nearest the damaged plank and carefully remove the baseboard and skirting. Use a pry bar to gently lift the edge of the laminate flooring.
Unclip the Planks: Laminate flooring is usually installed as a ‘floating floor’, which means the planks aren’t glued down but rather clipped together. Carefully unclip the planks by lifting them at an angle, and slide them out from the rest of the floor.
Remove the Damaged Plank: Once you reach the damaged plank, gently lift it out. Be careful not to damage any surrounding boards. If the plank is difficult to remove, you may need to cut it into smaller pieces using a circular saw. Always ensure to wear safety glasses when using power tools.
Inspect Subfloor: After removing the damaged planks, inspect the subfloor for any additional water damage. If any moisture is present, allow the area to dry completely before proceeding with the repair.
Drying the Subfloor
Maintaining a dry subfloor is of paramount importance in any flooring project. A wet subfloor can result in numerous problems such as warping, buckling, and even mold growth.
These issues can compromise the integrity of your flooring, leading to costly repairs or replacements in the future. Additionally, excess moisture can cause adhesives to fail, making it challenging for your new flooring to stick properly.
Therefore, ensuring that the subfloor is thoroughly dried before proceeding with the installation of new planks is a critical step in the repair process.
Techniques and Tools for Drying the Subfloor
When it comes to drying a subfloor, several crucial techniques and tools can expedite the process.
Air Movement: Enhancing air movement in the room can significantly accelerate the drying process. You can achieve this by opening windows and doors or using fans to increase ventilation.
Dehumidifiers: These devices are highly efficient in reducing moisture levels in the room. They work by extracting water from the air, which aids in drying the subfloor faster. There are various types of dehumidifiers available, including refrigerant and desiccant dehumidifiers.
The former is most effective at high temperatures and high humidity levels, while the latter is best for cooler environments.
Air Movers: These specialized fans create high-speed airflow, promoting rapid evaporation of moisture from the subfloor. They are available in different sizes and styles, including axial and centrifugal air movers, each suitable for varying situations.
Heat Drying: This technique involves using heaters to raise the temperature of the room, which in turn reduces relative humidity and speeds up the evaporation process. It’s important to monitor the temperature closely to prevent overheating, which could potentially cause damage.
Moisture Meters: These tools are essential for measuring the moisture content in your subfloor. They will help you determine whether the subfloor is sufficiently dry to proceed with the new flooring installation.
There are two main types: pin-type meters that measure moisture at various depths, and pinless meters that use radio frequency signals to measure moisture without causing damage.
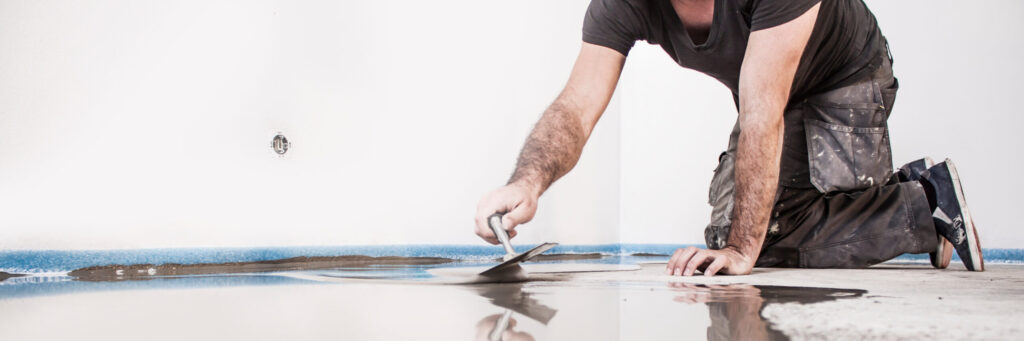
Replacing Damaged Planks
Guide to Selecting Replacement Planks
Material: Ensure that the replacement planks are of the same material as the existing subfloor. Common materials include plywood, particleboard, and OSB (Oriented Strand Board). The consistency of material ensures uniformity for your flooring.
Thickness: The thickness of the new planks should match the existing subfloor to maintain a level floor surface. Standard thicknesses range from 1/4 inch to 1 inch.
Grade: Choose the appropriate grade of the material. Some materials come in different grades based on quality. The grade affects the durability and stability of the subfloor.
Moisture Resistant: Opt for moisture-resistant or treated materials if your subfloor is prone to moisture exposure. This will help to prevent future water-related damage.
Step-by-step Process of Installing New Planks
Preparation: Begin by cleaning the subfloor to remove any debris. Make sure the area where the new planks will be installed is level and dry.
Measurement: Measure the area of the subfloor where the new planks will be installed. Use these measurements to cut your new planks to the correct size. Remember, it’s better to cut a little extra than not enough.
Installation: Lay the first plank in the corner of the room, making sure it is straight and secure. Continue laying planks, ensuring that the ends meet up exactly. Use a rubber mallet to tap the planks together.
Securing the Planks: Secure the planks to the subfloor using adhesive or nails, depending on the recommendation for your specific material. If nailing, be sure to countersink the nails so they won’t interfere with the floor covering.
Finishing Up: Once all the planks have been installed and secured, fill any gaps with wood filler and sand the entire floor to create a smooth, even surface.
Sealing: Apply a suitable sealant to protect the subfloor and prepare it for the final floor covering.
Related Topics:
Post-Repair Precautions
Tips to Prevent Future Water Damage
Immediate Cleanup: Wipe up spills and leaks as soon as they occur to prevent water from seeping into the laminate.
Regular Inspection: Regularly check your plumbing and appliances for leaks and address them promptly.
Use Mats and Rugs: In high-traffic areas and wet zones like entrances, kitchens, and bathrooms, consider using water-absorbent mats or rugs.
Avoid Excessive Water During Cleaning: When cleaning, use a damp mop instead of a wet mop to avoid excessive water.
Maintenance Recommendations for Laminate Flooring
Regular Cleaning: Use a dry or damp mop to clean your laminate floors regularly. Avoid using a wet mop or steam cleaner as these can damage the laminate.
Avoid Abrasives: Avoid using abrasive cleaners or scrubbing tools which can scratch and dull the surface.
Use Furniture Pads: Protect your floor from scratches and dents by using furniture pads under the legs of heavy furniture.
Deal with Stains Immediately: If you notice a stain, clean it immediately with a laminate floor cleaner to prevent it from setting in.
Yearly Inspection and Repair: Check your floor yearly for signs of damage and make necessary repairs to keep it in good condition.
Conclusion
Water damage can be a significant concern for homeowners with laminate flooring, but understanding how to address and prevent this issue can help preserve your floor’s durability and aesthetics.
By recognizing the signs of water damage, employing the right tools and techniques, and diligently following the repair process, you can effectively mitigate the damage and restore your laminate flooring to its original state.
Moreover, a proactive approach to floor maintenance and adopting preventive measures can help you avoid future water-related issues. Remember, immediate action is crucial when dealing with water damage.
Therefore, regular inspection and prompt response to any signs of damage are vital to maintaining the longevity and appearance of your laminate flooring.
2 thoughts on “How To Repair Laminate Flooring Water Damage: DIY Tips”