Welcome to our guide on “Fixing gaps in laminate flooring with duct tape”. Laminate flooring is a popular choice for many homeowners due to its aesthetic appeal and durability. However, over time, gaps can appear between the panels, disrupting the seamless look and potentially damaging the underlying floor.
But worry no more! We’ve got a quick, cost-effective solution for you – fixing gaps in laminate flooring with duct tape. This method may seem unconventional, but it works like a charm in sealing those unsightly gaps and retaining the beauty of your floor. Stay tuned as we guide you through this magic fix!
The challenge with gaps in laminate flooring lies in their potential to evolve into more significant issues over time.
Although the gaps might initially appear minor and merely a cosmetic concern, they can gradually widen and deepen due to various factors like temperature fluctuations, moisture, and physical wear and tear.
If left unaddressed, these gaps can expose the floor’s underlayment to damage, eventually compromising the overall integrity of the flooring structure. Furthermore, the uneven surface can also become a tripping hazard, thereby posing a safety risk.
Fixing these gaps promptly and effectively is therefore crucial to maintaining the longevity and aesthetics of your laminate flooring.
Required Tools
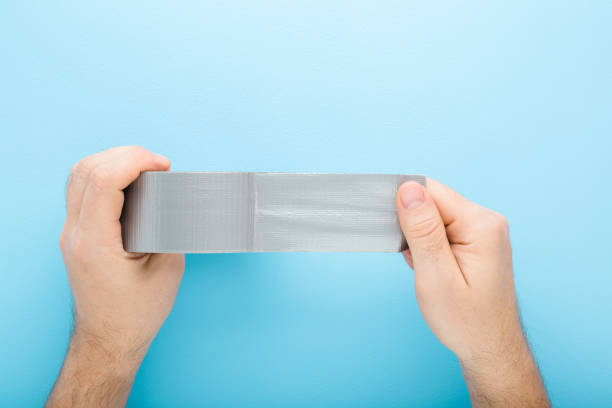
Duct Tape: This will be used to seal the gaps between the laminate flooring. It’s recommended to use a color that matches your floor to maintain its aesthetic appeal.
Utility Knife: A utility knife will be used to cut the duct tape to the desired length. Ensure the knife is sharp to achieve clean cuts.
Straight Edge or Ruler: This tool will guide your cuts on the duct tape, helping maintain straight lines and precision.
Cleaning Cloth: Before applying the duct tape, it’s necessary to clean the area around the gap to ensure the tape adheres effectively. A cleaning cloth will be perfect for this task.
Rubber Mallet: This can be used to gently tap the duct tape into the gaps, ensuring a snug fit.
Soft Bristle Brush (optional): This can be used to clean out any dust or debris from the gaps before applying the duct tape. A clean surface will ensure optimal adhesive contact between the duct tape and the floor.
Assessing the Damage
Before commencing any repair work, it’s crucial to thoroughly assess the size and extent of the gaps in your laminate flooring. Begin by visually inspecting each room, noting the location and approximate size of each gap.
For smaller gaps, less than 1/8 inch wide, a simple patching job with duct tape as described in the tools section will suffice. However, for larger gaps exceeding 1/8 inch, you may need a more intensive repair solution, such as replacing the affected planks.
Pay special attention to high-traffic areas, as these are more likely to develop significant gaps over time. Consider using a tape measure or ruler for a more precise estimate of gap width.
Deciding Whether a Duct Tape Fix is Suitable
Once you’ve assessed the damage and taken note of the size, location, and extent of the gaps, the next step is to decide whether a duct tape fix is the most suitable treatment for your laminate flooring.
This decision largely depends on the size of the gaps and the nature of the damage. Duct tape is a versatile and convenient tool for gaps that are less than 1/8 inch wide. It’s a non-invasive method of repair that doesn’t require any alteration of the existing flooring.
However, it’s crucial to remember that while duct tape can effectively conceal smaller gaps and prevent further damage, it’s not a permanent solution. Over time, the adhesive may wear out and the tape may peel, requiring reapplication.
If your laminate flooring has larger gaps exceeding 1/8 inch, or if gaps are accompanied by other forms of damage such as warping or cracking, a duct tape fix might not be enough. In these cases, you may need to consider more intensive repairs like replacing the affected planks.
Additionally, consider the visual impact. Duct tape comes in various colors and patterns, and you may be able to find an option that matches your flooring.
However, it may not provide as seamless a finish as a proper repair or replacement would. So, if aesthetics are a significant concern, duct tape might not be the best solution. Always weigh the ease and cost-effectiveness of a duct tape fix against the long-term durability and appearance of your floor.
Preparing the Floor
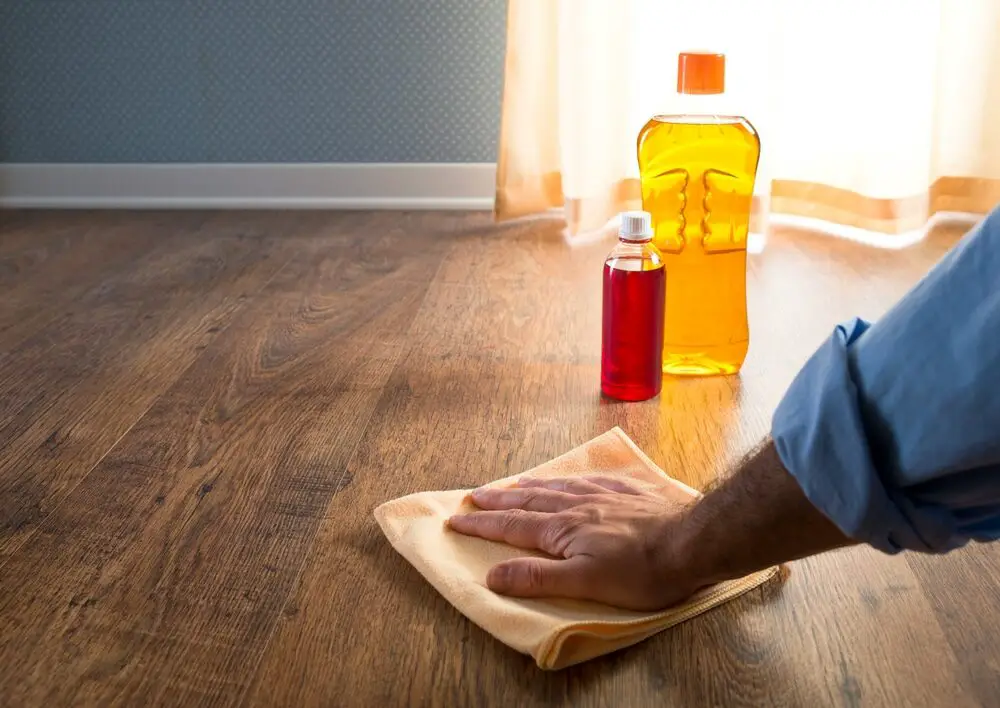
Before you start with the duct tape fix, it’s crucial to ensure that the laminate surface is clean and free of debris. Start by sweeping or vacuuming the floor to remove any loose dirt, dust, or grit that could interfere with the adhesive’s ability to stick to the flooring.
After that, wipe the area down with a damp cloth, making sure not to soak the laminate as excessive moisture can cause damage. If there are any stubborn stains or sticky substances, use a mild detergent diluted in warm water. Rinake is sure to thoroughly dry the surface afterward.
A clean, dry surface will help the duct tape adhere better and last longer. Also, avoid using abrasive cleaning tools or harsh chemicals as they can damage the laminate surface.
Cleaning not only prepares the floor for the duct tape fix, it also gives you a better look at the damage, helping you make an informed decision about the most suitable repair method.
It’s imperative to ensure the floor area is thoroughly dry before applying the duct tape. Any residual moisture can compromise the adhesive’s strength, resulting in a less effective fix.
You can use a dry cloth or towel to blot the area and absorb any remaining dampness. For a more thorough drying, consider using a hairdryer on a low setting, being careful not to apply too much heat which could also damage the laminate.
Applying the Duct Tape
Start by measuring the extent of the damaged area. Duct tape should ideally cover not only the damage itself but also a small margin around it for added stability. Use a ruler or a measuring tape to determine the length needed.
Once you have the measurements, unroll the duct tape from its roll, aligning it with the measurements you took. It’s advisable to add a little extra to your measured length to ensure full coverage.
Cut the duct tape using a pair of scissors, making sure the cut is as clean and straight as possible. Remember, it’s always better to cut slightly more than needed; you can always trim the excess later. Now, you have a piece of duct tape ready to be applied to your laminate floor.
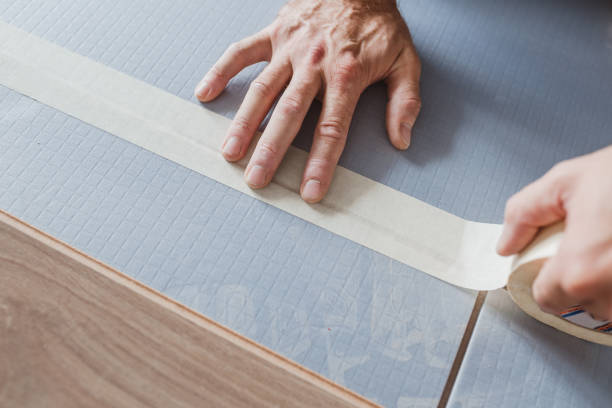
Carefully align one end of the duct tape with the edge of the damage on your laminate floor. Press it down smoothly and firmly, ensuring that there are no wrinkles or air bubbles, which could compromise the effectiveness of your fix.
Gradually unroll the duct tape along the length of the damage, pressing down as you go. It’s important to apply the duct tape as flat and smooth as possible to ensure a clean, even fit.
Once the duct tape is fully applied, use the flat of your hand or a small, smooth object to press down firmly on the tape, ensuring maximum adhesion.
Ensuring a Smooth and Firm Application
Once the duct tape is aligned and set in place, it’s essential to ensure it is applied smoothly and firmly. Using the flat of your hand, press down firmly on the tape, starting from one end and moving towards the other.
Apply consistent pressure in a sweeping motion to remove any air bubbles and prevent the formation of wrinkles. If your hand doesn’t provide enough pressure, a small, smooth object such as a roller can be used to apply more force.
After the tape is in place, go over it once more, paying extra attention to the edges to ensure maximum adhesion and a secure bond. Remember, the goal is to make the tape as flat and inconspicuous as possible.
Finishing Touches
Trimming Excess Tape
After ensuring the tape is applied smoothly and firmly, you may notice some excess duct tape extending beyond the damaged area. Carefully trim this excess using a precision knife or a pair of sharp household scissors.
It’s vital to be very delicate in this process to avoid inadvertently scratching or damaging the surrounding laminate. Aim to cut as close to the edge of the damage as possible, creating a seamless integration between the tape and the floor.
Once you’re done trimming, press down on the edges once more to ensure they are well-adhered.
Checking for Any Remaining Visible Gaps
After the duct tape is applied and the excess is trimmed off, the next step is to carefully inspect the area for any remaining visible gaps. These could be small areas where the tape didn’t adhere properly, or where the original damage was not completely covered.
To do this, you should get down to eye level with the floor and look across the surface, as this will make any gaps or lumps more obvious. You can also run your hand over the surface to identify any uneven sections.
If any gaps are found, apply a small piece of duct tape over them, ensuring that you press it down firmly for a smooth finish. Remember, it’s better to overlap tape than to have gaps between pieces.
Related Topics:
Maintaining the Floor
Preventing Further Gaps:
Preventive maintenance is key to averting further damage. Regularly clean the floor with a damp mop and avoid using harsh chemicals that might compromise the adhesive properties of the tape. Moreover, consider placing mats in high-traffic areas to reduce wear and tear.
The longevity of duct tape varies based on the foot traffic of the area and the quality of the tape used. Generally, check the tape every few weeks for signs of peeling or fraying.
If the tape is no longer adhering properly or the damage underneath becomes visible, it’s time to replace it. Always replace the tape promptly to avoid exposing the underlying damage.
Conclusion
In conclusion, fixing gaps in laminate flooring using duct tape is a cost-effective and straightforward solution for minor floor damage. This method allows homeowners to prolong the lifespan of their flooring and maintain its aesthetic appeal.
However, it’s crucial to remember that it’s a temporary fix and not a permanent solution. The duct tape requires regular maintenance and replacement to ensure effectiveness. Moreover, the tape should match the color of the floor to maintain its seamless look.
As always, prevention is better than cure, hence maintaining your floor by cleaning regularly and avoiding harsh chemicals is vital. Consider using mats in high-traffic areas to minimize wear and tear.
These steps will help keep your laminate floor looking as good as new for as long as possible. We hope this guide has provided you with useful insights into using duct tape to fix gaps in your laminate floor. Here’s to enjoying beautiful and well-maintained floors in your home!
FAQs
Can I use duct tape to fix gaps in all types of flooring?
Duct tape is highly versatile and can be used on various types of flooring. However, its effectiveness might vary depending on the flooring material. While it works well for minor gaps in laminate flooring, it might not be the best solution for ceramics or hardwood due to their distinct properties and repair processes. Always consult with a professional if you are uncertain.
Does the color of the duct tape affect its adhesive properties?
No, the color of the duct tape does not affect its adhesive properties. The color is purely aesthetic, allowing users to match the tape to their flooring for a seamless look. However, it’s important to choose high-quality tape, as the adhesive strength can vary between brands or types of tape.
1 thought on “Fixing Gaps In Laminate Flooring With Duct Tape: Quick Fix Magic”