Laminate flooring is a popular choice for many homeowners due to its aesthetic versatility and cost-effectiveness. However, it’s not uncommon to encounter the issue of laminate flooring lifting from its original position.
This can result from various factors such as water damage, improper installation, or natural wear and tear. But don’t worry, fixing laminate flooring that is lifting is not as daunting as it may seem.
In this guide, we will walk you through the steps to effectively rectify this issue and restore your flooring to its pristine condition.
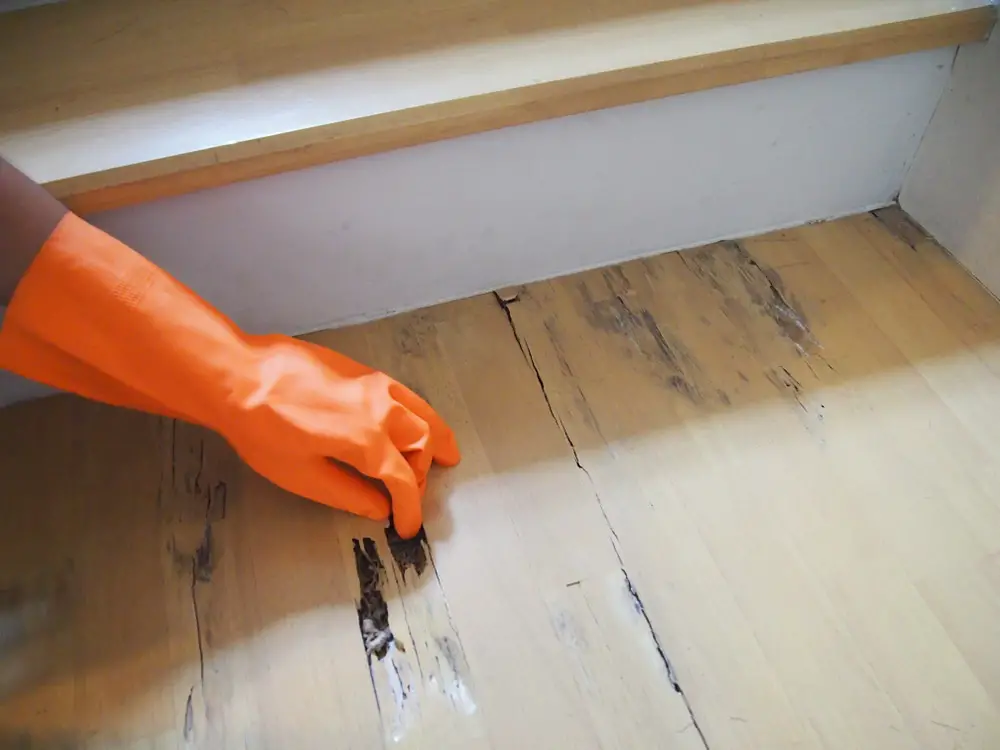
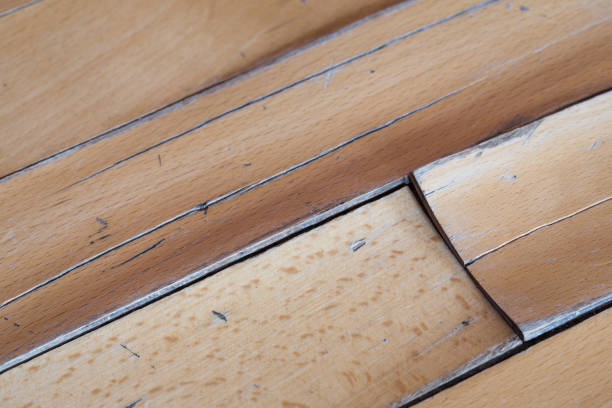
Lifting or bubbling in laminate flooring occurs when the planks or tiles separate from the subfloor, causing an unsightly and often uneven surface. This problem typically arises due to moisture infiltrating the laminate material, leading to swelling and distortion.
Other potential culprits could include temperature fluctuations or inadequate acclimatization of the flooring before installation. Regardless of the cause, this issue not only affects the aesthetic appeal of your floor but also poses a potential trip hazard, making it important to address promptly.
Materials Needed
To fix lifting laminate flooring, you will need the following materials:
Laminate Floor Repair Kit: This specialized kit usually contains a putty knife, color compounds to match your floor, and other materials necessary for cosmetic repairs.
Replacement Planks: In cases where the damage is extensive, you may need to replace some planks. Make sure to have extras that match your existing floor.
Floor Gap Fixer Tool: This is a handy tool to fix gaps in laminate and hardwood floors.
Suction Cup: Used in combination with the floor gap fixer tool to close the gaps between planks.
Pry Bar or Pull Bar: To remove damaged planks without causing further damage to the surrounding ones.
Rubber Mallet: This is used to tap planks back into place without causing damage.
Tapping Block: Used alongside the rubber mallet to evenly distribute force and protect your flooring.
Spacer Wedges: These are placed around the room’s perimeter to ensure a consistent gap for expansion.
Identifying the Issue

Before you can address the lifting, you need to pinpoint the root cause.
Start by examining the area where lifting is occurring. Is it near a source of water like a bathroom or kitchen? If yes, then water may be seeping into the laminate flooring causing it to swell and lift.
Remember to check for leaks in appliances or pipes which could be contributing to the moisture issue.
Next, consider the temperature and humidity levels in your home. Laminate flooring is susceptible to changes in these conditions. If your home undergoes extreme temperature fluctuations or has high humidity levels, this could be causing your laminate floor to expand and contract, leading to lifting.
Finally, consider the installation process. Was the flooring installed directly onto a concrete subfloor without a vapor barrier? This could allow moisture from the subfloor to migrate into the laminate.
Additionally, if adequate expansion gaps were not left around the perimeter of the room during installation, this could also cause the laminate floor to lift.
By identifying the cause, you give yourself the best chance of not only fixing the current problem but also preventing it from recurring in the future.
Preparation
Before you proceed with the repair of your laminate flooring, proper preparation of the area is essential. This involves cleaning and clearing the area to ensure you have a clean and safe workspace.
Clear the Area: Begin by removing any furniture or other items from the area where the repair will take place. This will give you enough space to work and prevent any accidental damage to your belongings.
Clean the Floor: Use a vacuum cleaner or a broom to sweep up any dust, dirt, and debris from the floor. Pay particular attention to the area where the lifting has occurred, as dirt can often accumulate in these areas.
Inspect the Subfloor: Once the floor is clean, inspect it for any damage or wear. This is also a good time to check for any moisture issues. If you find any, these should be addressed before proceeding with the repair.
Dry the Area: If moisture was detected during your inspection, use a dehumidifier to dry out the area before proceeding. Ensure the area is completely dry before moving to the next step.
Mark the Affected Planks: Identify the laminate planks that are lifting or damaged. You may want to mark these with a piece of tape or chalk to ensure they are easy to locate when you begin the repair.
Repair Process

Repair Due to Moisture/Water Damage
If the laminate floor lifting is due to moisture or water damage, you’ll need to replace the damaged planks. Here are detailed steps:
Remove the Damaged Plank: Start by removing the baseboard or molding around the floor if it overlaps the damaged plank. Use a pry bar to carefully lift the damaged plank from the floor.
Prepare the Replacement Plank: Ensure that the replacement plank matches the size, style, and thickness of the damaged one. If necessary, cut the new plank to the correct size.
Install the New Plank: Apply a high-quality waterproof glue on the groove part of the new plank. Carefully position the new plank in the gap left by the damaged one, and gently press it down.
Wipe away Excess Glue: After the plank is in place, wipe away any excess glue that seeps out with a damp cloth.
Secure the New Plank: Use a weighted object or floor roller to press down on the new plank, ensuring it bonds well with the surrounding pieces.
Let it Dry: Allow sufficient time for the glue to dry before walking on the area or replacing the baseboard or molding.
Repair Due to Improper Installation/Lack of Expansion Gap
If the laminate floor is lifting due to improper installation or lack of an expansion gap, the process will be slightly different.
Remove the Baseboard or Molding: Begin by carefully removing the baseboard or molding that is pressing against the laminate flooring.
Cut the Laminate: Using a circular saw cut a suitable expansion gap into the laminate planks that are closest to the wall. The standard expansion gap for laminate flooring is 1/4 inch to 1/2 inch.
Replace the Baseboard or Molding: After cutting the appropriate expansion gap, replace the baseboard or molding. Ensure it is not pressing against the laminate flooring.
Check for Other Issues: Examine the rest of the floor for any other areas where there might be a lack of expansion gap and repeat the process as necessary.
Monitor for Changes: Once the repair is complete, monitor the floor for a few days to ensure the lifting does not recur.
Related Topics:
Post-Repair Process
After the repair, it is crucial to maintain optimal conditions to prevent the recurrence of the problem.
Temperature Control: Laminate flooring is designed to perform best at room temperatures between 60°F and 80°F. Regularly check your thermostat and adjust it accordingly to maintain these temperatures.
Avoid drastic temperature fluctuations as these can cause the flooring to expand and contract, leading to damage.
Humidity Levels: Maintaining relative humidity levels between 30% and 60% is essential for the longevity of laminate floors. Excessive humidity can cause the planks to swell and buckle, while too low humidity can lead to gaps between the planks.
Consider investing in a humidifier or dehumidifier to maintain the ideal humidity levels in your home.
Use of Curtains or Blinds: Direct exposure to sunlight can cause laminate flooring to fade and warp. Use curtains or blinds on windows that let in direct sunlight to protect your flooring.
Regular Maintenance: Regularly clean your laminate flooring using cleaning products designed specifically for laminate. Avoid using excess water, as it can seep into the seams and cause damage.
Conclusion
Addressing the issue of lifting laminate flooring can seem like a daunting task, but with the right tools and process, it’s perfectly manageable to restore your floor to its original condition.
From identifying the cause, whether it’s moisture damage, improper installation, or issues with temperature and humidity, to the repair process and the all-important post-repair maintenance, this guide has covered it all.
Always remember that regular maintenance, humidity control, and temperature regulation are key to preventing future lifting. With these steps, your laminate flooring can continue to enhance the beauty of your home while providing a durable and cost-effective flooring solution.
FAQs
Can I fix lifted laminate flooring myself or should I engage professional help?
While minor lifting can often be fixed with a DIY approach, complex or extensive damage may require the expertise of a professional. If you’re handy and understand the process, you can certainly address minor lifting yourself. If the damage is widespread, it’s recommended to contact a professional to prevent further damage to your flooring.
How can I prevent water from damaging my laminate flooring?
Preventing water damage to laminate flooring involves taking several precautions. Always clean up spills immediately to prevent water from seeping into the seams. Avoid using excess water during cleaning. Using mats or rugs in high-moisture areas like kitchens and bathrooms can also help protect your flooring. Regular maintenance and proper care will go a long way in preventing water damage to your laminate floors.

1 thought on “How To Fix Laminate Flooring That Is Lifting: DIY Solutions”